S.H.A.M. (Steve's Horse and Musket) Rules

Version 0.1: 28 June 2003 - Steve Holmes

Introduction

The primary objective is to produce an extremely simple wargame.
The differences of the 3 arms of horse and musket should be reflected: Foot, Guns, Horse.
Command/Control introduces a fourth (and most important) arm: Commanders.

In pursuit of simplicity, various facets of traditional wargames have been abandoned:
Formations are kept to a minimum.
One reaction test is used to cover unit activation and morale failure.
Troop Quality, differing unit size and cavalry "weight" are not represented.
Even terrain is negected in this early release.

This simple approach may not suit all, and may offend some.
If they are not for you, there are plenty of alternative sets.
The rules swere developed with the purely selfish objective of gaming with my own sons. 

Game Concepts

Armies

Armies are composed of elements mounted on bases 4cm wide and 3cm deep.
Each element is one of 4 types.
Command: Army commanders and Divisional Commanders - individual elements
Guns: Cannon - individual elements.
Horse: Cavalry - formed into units of 4 elements.
Foot: Infantry - formed into units of 4 elements.

Command Structure

Army Commander commands Divisional Commanders, plus Reserve Guns, Horse or Foot (if any).
Divisional Commmanders command Guns, Horse and Foot.

Turn Sequence

The sequence is described in detail later.
Movement alternates between sides: Moving side are active, others are passive.
    Command:  Active side Command units roll d6 for command points. Command figures move. Attempt to rally running units.
    Move:  Active side tests reaction for units wishing to move, successful units may move.
    Shoot:  Passive side shoots, followed by active side. Reaction tests for those taking hits.
    Charge:  Active side tests reaction for units wishing to charge, successful units may charge.
      Passive side now tests reaction for any of its units wishing to charge, successful units may charge.
    Fight:  Hand to hand fighting is resolved.

Command Points:

Command points are marked by placing a d6 showing the appropriate score beside the commander figure.

Command figures may spend command points to assist units under their command.
To add 1 in a reaction test for units within 6cm.
To add 1 to the dice of an attached unit in shooting or fighting.

The army commander may transfer his command points to a divisional commander within 24cm at any time.

The Reaction Test:

This is the heart of the command control rules.
Units wishing to move, charge, not run away after casualties, rally must pass a reaction test.

Count the number of elements remaining in the unit  (Guns always count as 4)
Add 1 if the unit commander pends a command point.
Roll d6 and add the total.
Score 6 or more to pass the reaction test.

The Turn Sequence in Detail:

Begin at the top and work through this sequence.
After each pass through, active and passive sides exchange roles and repeat.

Command:

Passive commanders retain any command points left over from their previous active turn.
Each active commander rolls d6 for new command points and places it beside the command model.
Commanders may now move up to 12cm, but reduce their command point score by 1 if they do so.
Each commander may attempt to rally one running unit by passing a reaction test.

Move:

Horse move up to 12cm.
Foot and Guns move up to 6cm.
Commanders do not move in this phase since they moved during the command phase.

Running elements run their full move distance away from the nearest enemy and lose one element after the rout.
Other units may only move after performing a successful reaction test.

No element may move closer than 3cm to enemy units during the movement phase
Formation change from single to double ranks or vice versa counts as a move.
Movement is forward, by wheeling or about-face.
Guns which move may not shoot this turn.

Shoot:

Units from the passive side shoots first, then survivors of active units return fire.
Only Foot and Guns may shoot.
Front rank elements roll their dice and and consult the table to determine how many kills they cause.

Shooting - Scores required to kill an element

 Shooters

Range

d6 per shooting 
element

score to kill

Foot

6cm

1

6

Guns

6cm

2

5,6

Guns

24cm

2

6

Commanders may each spend one command point on  a single attached  unit to add one to all its shoting dice.
Guns firing at 2 rank foot units add 1 to their dice.

For each kill on foot and horse, remove an element and place a casualty marker by the unit.
Guns are different, 2 shooting kills in a single turn are required to destroy a gun, single shooting kills are ignored.
After both sides have fired, unit which lost elements during shooting test reaction, units which fail run away.
Charge:

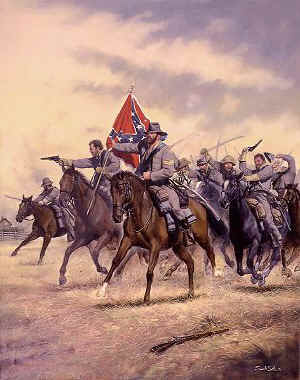
Phasing foot and horse units which are up to 6cm from an enemy target may attempt to charge.
Test reaction. If successful they charge home, if not they stay in position.
After phasing units have tested to charge, non-phasing foot and horse units may also attempt to charge.

Foot may not charge horse.
Guns may not charge.

Fight:

Resolve fights between units in combat.
Front rank elements roll d6 and consult the table to determine the score required to cause a kill.
Commanders may spend one command point one one attached unit to to add one to all its fighting dice.
Fighting - Scores Required to kill an element.
Attackers
Target
 
Guns
Horse
Single Rank Foot
2 Rank Foot
Guns
-
6
6
6
Horse
4,5,6
5,6
5,6
6
Single Rank Foot
5,6
6
5,6
5,6
2 Rank Foot
5,6
5,6
4,5,6
4,5,6
Losers of hand to hand (Suffered more kills than they caused) now test reaction and run if they fail.
If losers stand, then winners must test reaction and run if they fail.
If both sides stand, then losers withdraw 3cm still facing their enemy.

Horse which cause foot to run or withdraw may pursue.
Pursuing horse remain in contact, and avoid the need to test for movement or charge next turn.